Showing posts with label Crafts. Show all posts

Tuesday, August 18, 2015

Headband/Hair Bow Wall Display

Ya'll...my due date is FIVE days away. 5. The hospital bags pretty much comes with us anywhere we go and I've been bouncing away on my physio ball but I'm still not experiencing many concerning, painful contractions. The days are going by fast....but slowly at the same time as I'm waiting around if that makes sense. To fill the time, I thought I'd finally bust out the old macbook and post the tutorial on the hair accessory wall display I created a couple weeks ago! 

Everything I needed for this little craft I picked up at Michaels. I needed: 
  • a large frame 
  • two different sized ribbons 
  • mini screw-in hooks 
  • flower accents 
I also needed a hot glue gun, which I borrowed from my mother-in-law because ours is still packed up somewhere. 


This craft came together in seriously no time...like a matter of minutes. I removed the glass and backing to the frame. Then I turned the frame over, cut strips of ribbon to fit from the top of the frame to the bottom, spaced them out, and hot glued each ribbon to the back of the frame. Once the ribbon had been secured, I, with the help of Ryan, screwed in the mini hooks to the bottom of the frame. To finish the craft, I threw some fabric flowers up at the top for decoration.


In order to hang the display, we added a metal bracket to the back of the frame. Et Voila!


The best part of this craft was going through all of the bows and headbands I've collected over the past few months and putting them on display. I can't wait to actually use them any day now.


Alright, Itty Bitty.... Get your hiney out now, would yah?! We're more than ready for you! 

Tuesday, July 28, 2015

A Nursery Craft

So the nursery is finally starting to come together! For a while there, I wasn't sure if we were even going to have a nursery to bring itty bitty home to, but things work out the way they're supposed to and we got ourselves into a house with a few weeks to spare!

To fulfill one of my July goals, I got busy this week on my first (of many) nursery crafts to make the room as special as possible for our little girl! This craft came together in no time and was incredibly easy! I LOVE the way it turned out!


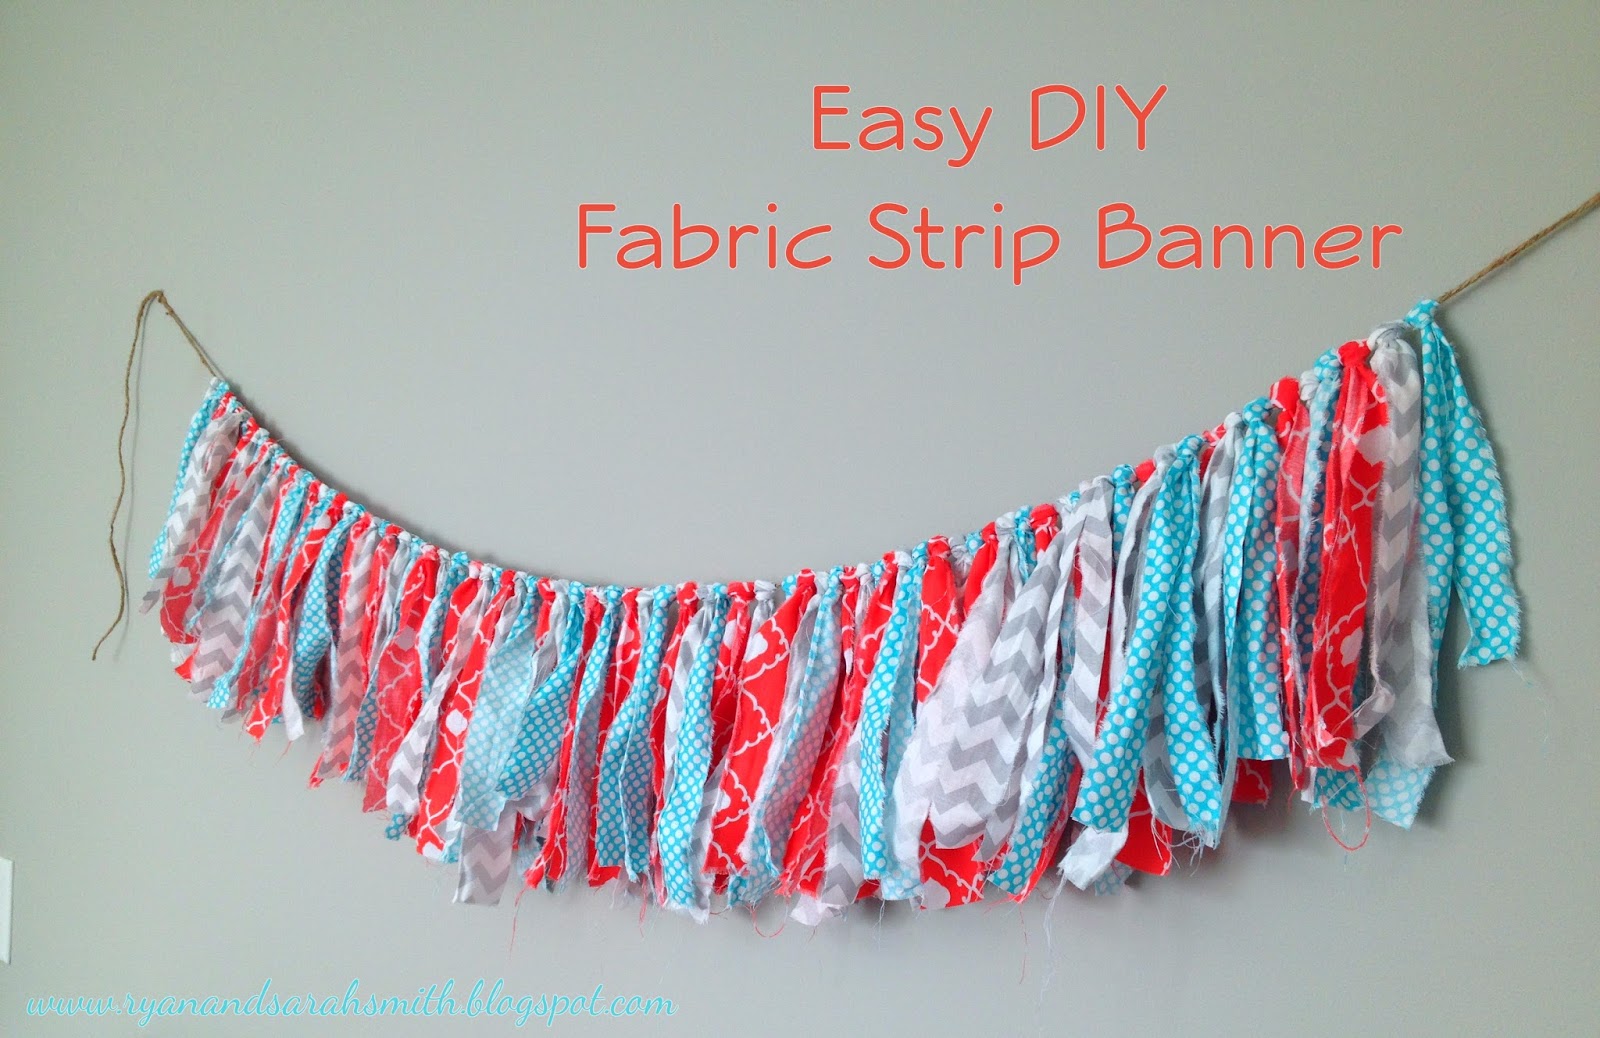
Above the crib, there was a giant blank wall that I knew I wanted to fill with either itty bitty's name or initials and a little extra decoration. While at Hobby Lobby last weekend, I browsed the fabric department and picked out three fabrics that I thought complemented the bedding in the nursery and would bring some color to the gray walls. Using those three fabrics, I created a Fabric Strip Banner to hang above the crib!

Here's what you need:


  • 1/2 yard of however many fabrics you choose. Again, I chose three so I had three 1/2 yard pieces of fabric 
  • Thick jute or string 
  • scissors 
I began by cutting 1/4 slits into the side of the fabric about an inch or so apart. It doesn't have to be exact. In fact, the beauty in this project is in it's imperfections. After I cut the slits into the side of the fabric, I ripped along each slit to make strips. Ripping instead of cutting allows the edges of the fabric to become frayed, giving it a more rustic feel.

Once the strips had been cut for each fabric, I began tying them onto the jute. To do this, I folded the strip in half, creating a loop in the middle and pulling the two ends through around the jute. The strips looked like this:


Alternating fabrics, I kept going until I had reached the desired length for my banner. That's it. How easy is that?!?

Ryan and I hung the banner above the crib yesterday evening and I LOVE IT! Now all I need is to figure out which type of letters I want above it for her name!


Just for fun....here's a sneak peak of the nursery! A full blog post will be up on the nursery as soon as I finish hanging the last few things in her room!

Monday, December 22, 2014

Christmas Cards 2014

Happy Winter Solstice! I'm SERIOUSLY looking forward to some extra sunlight from here on out!
 
This year, I could not be any happier with how our Christmas cards turned out!
 
 
My only experience ever making and ordering Christmas cards was always through CVS, but earlier this year I noticed a killer Groupon for 50 cards from Staples for $10! That's seriously cheaper than our cards were last year! I jumped on the offer and quickly passed it along to my parents and in-laws. Ryan and I made the cards online with some of my new favorite pictures from this past year and they were ready for pick up the next day! My only regret is that we didn't order 100 for $20 instead! 


To address the cards, I used a combination of two different washi tapes to make the envelopes just a little more festive...that is until I ran out of washi tape. (sorry friends!)


Three more days until Christmas and one more day until Ryan and I finally catch a ride back to Georgia!! Happy Holidays!!


Monday, December 8, 2014

My Favorite Things To Do With Burlap (Right Now)

Hello and happy Monday! This weekend went by like a blur and was filled with mall shopping, whiskey tasting, football watching, and errand running. While everything was great, the football game could have gone a little better (darn you, FSU!) 

So...if you've read any of my recent blogs...you already know what my first Christmas craft of the season was. Without being redundant, I just wanted to share a few quick tips on how this little burlap wreath was created. 

After scouring Pinterest for craft ideas in November, I quickly decided a festive burlap wreath for the front door would be perfect! There were so many tutorials on Pinterest that I thought for sure it would be a breeze. Wrong! 
Luckily, I first tackled this craft at my friend Rachel's house. I say luckily because we all know two heads are better than one! On top of that, Rachel is a master crafter, so we figured it out pretty quickly together! We found that the best way to figure out how to put together a burlap wreath is to use a combination of directions from various websites. There are 2089357483942 different blog posts that can be found via Pinterest already, so I really don't see the need for me to spell it out one more time. 

Basically, all you need is a wire wreath, burlap ribbon (about 60 ft.), some accent ribbon, and either floral wire or pipe cleaners. I got all of my supplies at A.C. Moore for $8! These wreaths sell for $45+ on etsy! 


Just some extra tips: 
  • Start your burlap weaving on the outermost wire ring and weave over, under, over, under toward the inside of the ring. 
  • Weave the burlap through four times in each section so that the wreath is fuller. 
  • I really wanted to add an accent ribbon in to bring a pop of color to the neutral burlap. I found it best that the accent ribbon be wired. I weaved the accent ribbon through each section two times, trying my best to space them out evenly. 
That's it! I enjoyed this craft (and the end result) so much, that I made another one for my mom in Virginia! 

Another way I'm loving burlap this holiday season is as a Christmas card holder! I had some extra burlap ribbon from the wreath craft that I wasn't sure what to do with. Then one day while I was perusing the isles at Marshalls, I came across a couple packs of festive mini clothespins and immediately knew what to do! 

I didn't end up using the washi tape back there for this craft...but you will be seeing that again in a few days! 

Off of our makeshift pantry in the kitchen, I rolled down the burlap ribbon. I am currently using the clothespins to hold all of our beautiful Christmas cards we've already received (Seriously people... some of ya'll are on TOP of your game this year!). I LOVE the way it turned out and that I get to admire everyone's cards every time I walk into the kitchen! 


Alright, I am off to a Christmas cookie swap! The Christmas festivities have officially begun for this little Smith family! Have a great night, everyone!