Showing posts with label Recipes. Show all posts

Tuesday, December 23, 2014

#59: First Annual Scarf Swap

This Holiday season, I finally decided to try my luck at hosting a girl's night/Christmas party! I've wanted to host a scarf swap for some time now and thought that this could be the perfect White Elephant/Dirty Santa gift exchange just in time for Christmas!

Last Friday was the big day! Everyone invited brought some sort of appetizer or dessert to share and a wrapped brand new scarf to swap. For my contribution, I made a Christmas cranberry punch, THESE ham and swiss sliders, and THIS hot chocolate cheesecake dip.


Christmas Cranberry Punch

Ingredients:
  • 1 qt. Sparkling Water
  • 1 qt. Cranberry Juice 
  • 1 cup Lemon Juice
  • 1/2 cup Sugar 
  • 1 Orange
  • 1 cup Strawberries, halved
  • 1-2 handfuls Fresh Cranberries 
Directions:
In a bowl or serving jar, combine lemon juice and sugar, mixing well until sugar is dissolved. Add sparkling water and cranberry juice and stir. Add halved strawberries, cranberries, and thin slices of orange to the mixture. Serve cold. 


Hot Cocoa Cheesecake Dip
We spent the first couple hours of the party eating and mingling before getting down to the scarf swap portion of the night. Since there were 11 of us, I cut out slips number 1-11 and placed them in a mason jar, asking each guest to pick a number.


Once each person had their number, number 1 went first (obviously). The rules were that you could either open a gift or steal someone else's scarf, causing them to have to open another gift. You couldn't open a gift and then choose to swap with someone.


After everyone had either opened or stolen a scarf, we all had in our possession a beautiful new piece of neck accessory to add to our collections!

We spent the rest of the night hanging out, getting to know each other better, and devising a plan to get to Vegas in 2015. #somuchroomforactivities


I am so glad a group of my closest friends were able to get together for this girls night and feel so blessed to have these girls in my life! Thanks for a successful Christmas party, ladies!

 And now I'm going to close this post out with a final picture of our tree (because why not?!) Ryan and I are heading to the airport in just a little bit for our flight to Atlanta!

Home, here we come!

Friday, November 28, 2014

Juicy Crock-Pot Turkey Breast


Hello and Happy Black Friday!!
 
I hope everyone had a wonderful Thanksgiving day with their friends and/or family! The Schoeff/Smith clan had a great day in Virginia and an awesome dinner at the Mimslyn Inn in Luray!
 
I'm sure ya'll are all turkeyed out by now, but I never got a chance to post this recipe before the big holiday! Who says turkey is only for Thanksgiving, though?!? As I mentioned in this post, I had my first go at cooking a turkey breast last weekend when we had our friends, Eliot and Lauren, over for a little Friendsgiving dinner. I was pretty nervous since I had never attempted to cook a turkey breast before and know how dry they can get. Also, cooking a turkey breast in the crock-pot was a pretty new idea to me. But I gave it a go anyways. I'm glad I did because the result was an easily prepared and juicy turkey! This will definitely be made again for a nice Sunday dinner and used in sandwiches throughout the week! A much better option to salt-loaded lunch meat!
 
Ingredients:
 
  • 6-7 lb. Turkey Breast (bone-in)
  • 1 cup Orange Juice
  • 1 can Cranberry Sauce (I used jellied, but you could use whole if you prefer- jellied made an easier gravy since I didn't have to break down the cranberries.)
  • 1 package Onion Soup Mix
Directions:
Take the turkey breast out of the packaging and make sure the cavity is cleared out. Place the bird in the crock-pot.
In a mixing bowl, combine orange juice, cranberry sauce, and onion soup mix. Pour over top of the turkey.
 
 
Cook on low for 8-9 hours or until the meatiest part of the bird reaches 175 degrees.
 
Remove turkey from crock-pot. You have two options here. You can either place the bird on a baking sheet and broil for 5 or so minutes to crisp up the skin or just let it rest for 5 minutes before carving.
 
 
Carve it up and serve!! Enjoy- I know we did!


Thursday, November 20, 2014

#TBT, updates, and # 32: Crock-Pot Creamy Tortellini Soup

Hello and happy Thursday!! 

My trusty Timehop informed me yesterday that it has officially been one year since I first set out on my 101 in 1001 journey! 365 days down, 636 days to go!  
I found it fitting today to update the old list and share a new favorite recipe with ya'll, getting me one step closer to crossing another item off! This recipe came together super fast in the crock pot and tasted delicious! We definitely have plans to make it again in the near future. 
Without further ado, I present to you Creamy Tortellini Soup! 


Ingredient: 
  • 1 pkg. Frozen Cheese Tortellini
  • 1 box Chicken Broth 
  • 2 cans Italian Diced Tomatoes
  • 1 block Cream Cheese
  • 1 lb. Hot Italian Sausage (or mild if you don't like things too spicy)
  • Fresh Spinach 
Directions:

In a skillet (or in your crock pot if you have an amazing crock like mine!), brown sausage. Combine all ingredients in the crock pot and cook on low for 5 hours, stirring half way through. 

THAT'S IT! I mean... could it BE any easier?? 

Enjoy! 


Tuesday, November 18, 2014

Taco Crescent Ring


For Life Group last Thursday, the food theme was brought to you by "the letter R!" Racking my brain for recipes that began with the letter "R" for a couple days, I remembered one of my favorite party dishes...the crescent ring. Janelle and I made a buffalo chicken crescent ring together a couple months ago for a get together. While we were assembling the ring, we came up with tons of different other fillings that would work great inside the crescent ring. Last Thursday, I finally decided to try a different filling, and it turned out awesome! Plus it was super easy and came together in thirty minutes, baked and ready to eat! 


Ingredients: 

  • 1 1/2 lbs. Ground Beef 
  • 2 cans Crescent Rings 
  • 2 pkgs. Taco Seasoning
  • 1/2 cup Water 
  • 2 cups Mexican Cheese, shredded
  • Taco Sauce and Sour Cream, optional

Directions: 
In a skillet, brown the ground beef. Once browned, add in taco seasoning and water. Bring to a boil and then simmer on low for 5 minutes.

While the meat is simmering, lay out parchment paper on a baking sheet. Spread out each crescent triangle, leaving a circle in the middle. I started with four triangles, forming the points on a compass with points facing out. I filled in the gaps from there with the remaining triangles.

Spoon the meat in a ring around the dough about an inch from the center edge. Sprinkle a cup of cheddar cheese over top of the meat.

Wrap the triangles over the filling, pressing the small edge into the center ring to seal shut.

Bake for 15 minutes at 425 degrees. Let cool for five minutes. At this point, you can transfer to a serving platter and fill the center ring with lettuce, grape tomatoes, sour cream, cheese, taco sauce... you name it! I served mine with sour cream and taco sauce, mainly because I did my grocery shopping at Target this week and they didn't have much fresh produce. Lazy me.

 Enjoy!

Wednesday, October 22, 2014

Fall Chili Recipes, Ya'll

With the weather being cool and rainy lately (especially rainy at this particular moment), I've really been craving warm and hearty crock-pot meals for dinner. In the last few weeks, I've pulled my crock-pot out more times than I haven't. I've always been a huge fan of soups this time of year, but Ryan is convinced that soup does not constitute a "meal." Since he was never really on board, I rarely ever make any sort of soup, including stews, chili, and chowders. HOWEVER, we had friends over a couple of weeks ago to watch the Pats game and I made a big batch of chili to share. Surprisingly, Ryan actually enjoyed it! So, clearly with this sudden change of heart I have been making as many variations of "soup" that I can get away with. Tonight, I'm sharing two of my favorite chili recipes, which happen to be polar opposites of each other. The first is a traditional chili recipe I have made time and time again, tweaked from one of my favorite Southern Living recipe books. The recipe makes a TON... I mean a ton! But it can always be cut in half OR frozen to make TWO meals!

Traditional Big Batch Chili 


Ingredients: 

  • 4 lbs. Ground Beef
  • 2 Onions, chopped
  • 1 Green Bell Pepper, chopped
  • 3 tsp. Minced Garlic
  • 3 (14.5 oz) cans Diced Tomatoes, undrained
  • 4 (8 oz) cans Tomato Sauce 
  • 1 (6 oz) can Tomato Paste
  • 1/4 cup Chili Powder
  • 1 tbsp. Sugar
  • 1 tsp. Salt
  • 1 tsp. Pepper
  • 1/2 tsp. Paprika
  • 1/2 tsp. Crushed Red Pepper
  • 2 (16 oz) cans Kidney Beans, rinsed and drained
  • Toppings: Sour Cream, Cheddar Cheese, Green Onions 
Directions: 
1. Cook ground beef until no longer pink; drain. 
2. Place meat in slow cooker; stir in the rest of the ingredients. 
3. Cover and cook on low 7-8 hours or high 5-6 hours. Serve with desired toppings

Simple and Traditional! 


The next chili recipe is a little more unique. I had a couple of sweet potatoes in the house that I wanted to cook up and I thought they would be a great addition to a turkey chili, but I COULD NOT find a recipe online that I liked...so, I made one up! I was a little nervous about how this would turn out, but it was delicious! Next time, I will probably add more beans. (I didn't add as many this time because my friend Heidi doesn't like them and she was coming over for dinner.) 

Turkey & Sweet Potato Chili 

Ingredients:
  • 1 lb. Ground Turkey
  • 1 Onion, chopped
  • 1 Red Bell Pepper, chopped
  • 2 Sweet Potatoes, diced
  • 30 oz. Tomato Sauce
  • 30 oz. Diced Tomatoes 
  • 1 can Black Beans, drained and rinsed 
  • 2 tbsp. Chili Powder
  • 1 tbsp. Cumin
  • Salt/Pepper, to taste 
Directions: 

1. Brown ground turkey and onion; transfer to crock-pot.
2. Combine remaining ingredients and cook on low for 7-8 hours or high for 5-6 hours.


There you have it! Two very different, very tasty chili recipes to try out during this wonderful time of year!

Happy Hump Day, ya'll!

Tuesday, August 12, 2014

Funfetti Chocolate-Chip Cookies

Man, these last few weeks have been super busy for Ryan and I- swim lessons for a friend's daughter, Super Summer Kids Week, Family Fun at the Beach, and cook-outs to name a few of the events filling our days and nights! Tonight is going to be the first night in over 10 days that we will be sitting down to a home-cooked meal (Spaghetti and Meatballs- YES)! 


After a swim lesson last week, I hosted my friends Candice and Rachel along with their children for lunch! Candice offered to supply the main course for lunch, but I wanted to make a fun dessert that the littles could help make! So, the night before I whipped up a batch of chocolate chip cookies with a twist! The cookies turned out great and I the kids definitely had a blast scooping the dough onto cookie sheets....and eating them shortly after! Win! 


Ingredients: 
  • 1 cup Butter, room temperature
  • 1 cup Dark Brown Sugar
  • 2 Eggs
  • 2 tsp Vanilla
  • 1 tsp Baking Soda
  • 1 tsp Salt
  • 1 1/2 cups Funfetti Cake Mix
  • 1 1/2 cups Flour
  • 1/2 cups Sprinkles
  • 2 cups Chocolate Chips
  • 2 cups coarsely chopped Golden Birthday Cake Oreos 
Directions: 
1. In a mixer, cream butter and sugar together until light and fluffy. Add in eggs and vanilla and beat until smooth. 
2. With the mixer on low, add in baking soda, salt, flour, and cake mix, stirring until the mixture comes together. 
3. Add in sprinkles, chocolate chips, and chopped oreos. Stir until evenly incorporated. 
4. Chill dough in the refrigerator over night. (If you can stand to wait that long!) 
5. When ready to bake, preheat oven to 350 degrees. Roll dough into balls, placing them onto a cookie sheet. 
6. Bake cookies for 8-10 minutes. Cool and enjoy!


Monday, July 14, 2014

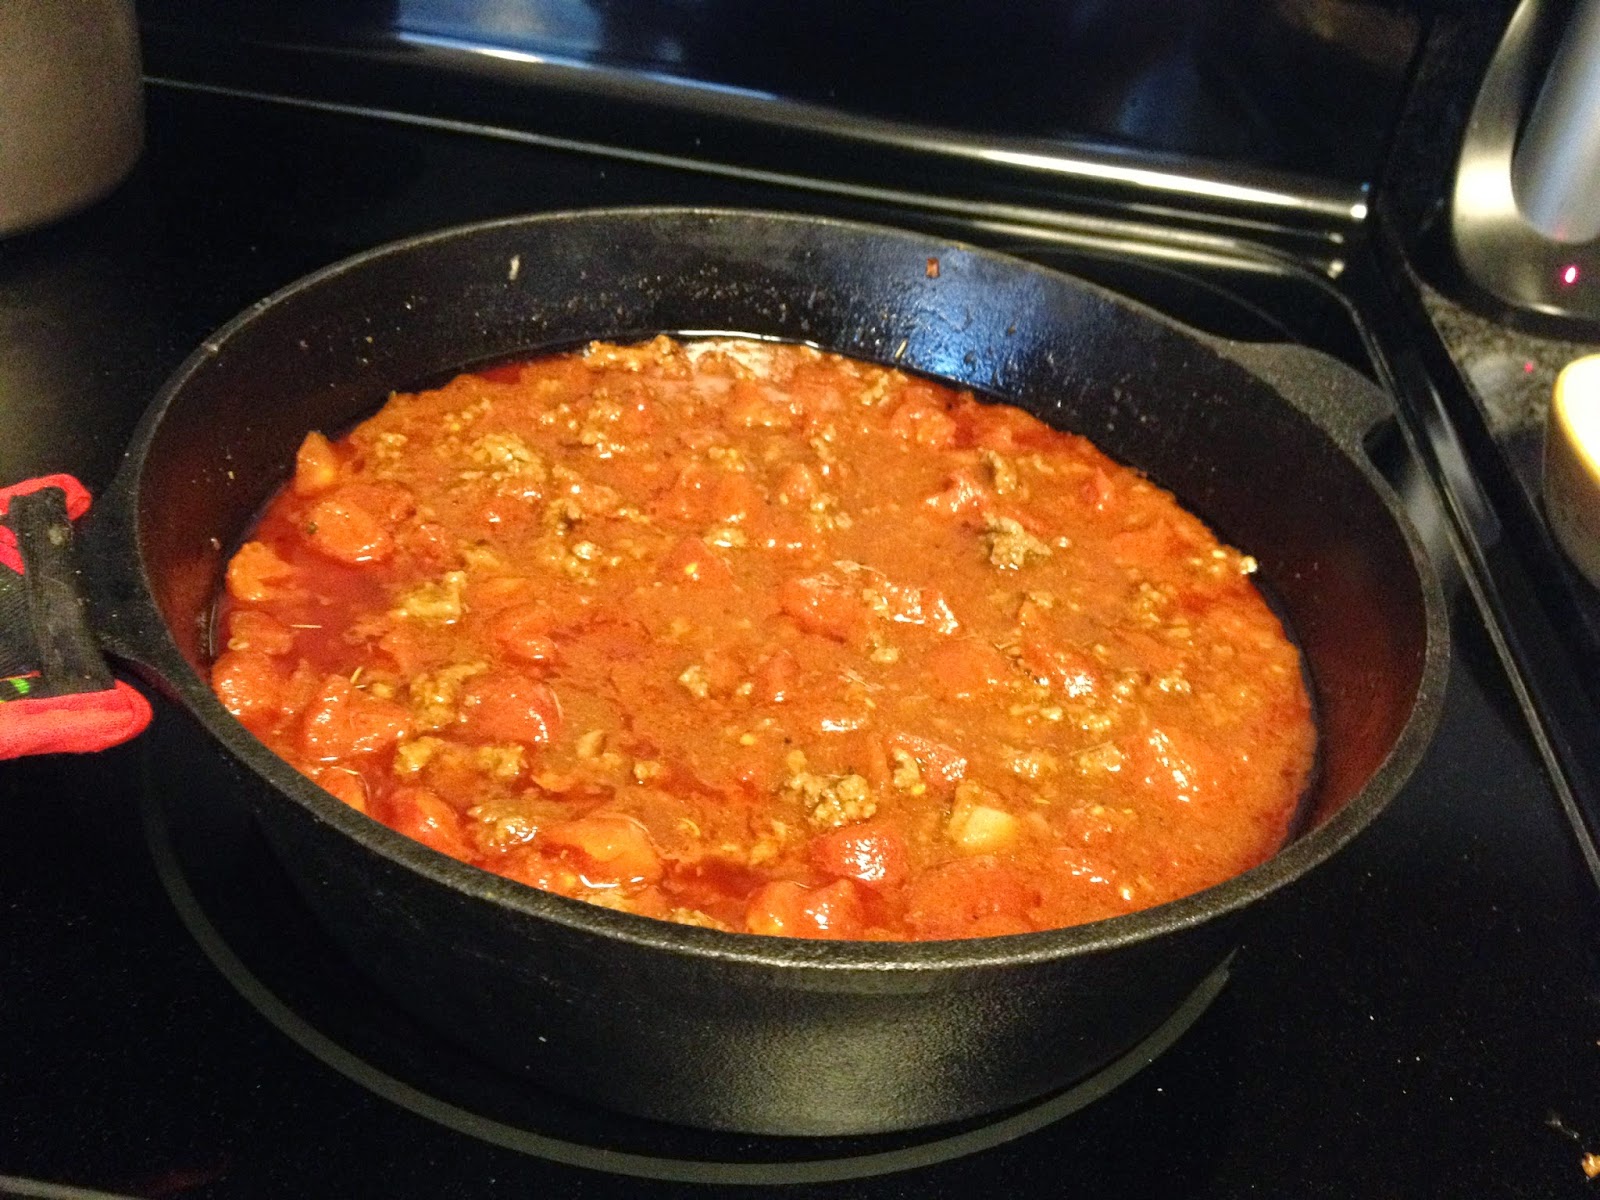
Spicy spaghetti and Meat Sauce


If you don't know by now... I am a HUGE fan of pasta dishes and make them quite frequently. As a matter of fact, I don't think I've ever eaten a pasta dish I didn't like. Since I began to learn how to cook and experiment in the kitchen, I have always wanted to make my own meat sauce from scratch. While there are some decent jarred pasta sauces out there (Trader Joe's Creamy Tomato Basil, get in my belly!), I think there is something special about a homemade sauce. A few weeks ago, I finally decided to try my hand in this department and came out with a pretty tasty pasta sauce if I do say so myself. Even Ryan liked it and he HATES tomatoes! 

Ingredients: 

  • 1 box spaghetti
    (I used vermicelli) 
  • 1 large sweet onion, chopped
  • 1 tbsp. extra virgin olive oil
  • 1 tbsp. minced garlic
  • 1 lb. ground beef
  • 1 tbsp. ground cumin
  • 2 tbsp. chili powder
  • 1 tsp. salt
  • 2 tsp. crushed red pepper
  • 1 tsp. black pepper
  • 1 tbsp. dried oregano
  • 1 tbsp. rosemary
  • 2 (14.5 oz.) cans of diced tomatoes
  • 1 (14.5 oz.) can tomato sauce
  • 2 tbsp. tomato paste
  • ½ cup reduced-sodium beef broth
  • Parmesan Cheese for topping

Directions: 
  1. Cook pasta according to package instructions, reserving 1/2 cup of cooking water before draining. 
  2. Saute the onion in a large skillet (I used the cast iron) over medium-high heat in olive oil. Add garlic to the pan and continue to saute for about 4-5 minutes, or until the onions become translucent. 
  3. Add ground beef to the pot and cook until the meat browns. 
  4. Add all of the spices and stir to combine. Add the tomatoes, tomato sauce, tomato paste, and beef broth and simmer for 10 minutes. 
  5. Add the cooked pasta and cooking water, tossing to combine. Let simmer on the stove for a few minutes to thicken the sauce. 
  6. Enjoy! 

So good! Next time I make this sauce, I might try my hand at canning to store some for a later date since this recipe makes a decent amount of sauce! 


I can officially cross #31 off of my 101 in 1001 list!

Happy Bachelorette Monday Night, y'all! 

Thursday, June 26, 2014

Easy Glazed Salmon

Now that summer is upon us, I realize that I can't keep eating all of these crazy unhealthy delicious pasta dishes every night (so I've settled for every other night instead). In an effort to lighten up our meals around here, Ryan and I have been killing this recipe for a couple months now and it is an absolute favorite of both of ours. It's actually one that Ryan introduced to me during the time where I was stuck in class all night long and he was responsible for dinner. Not only is it a fairly easy recipe, but it takes hardly any time at all! Double win!


Ingredients:

  • 1/4 cup Brown Sugar
  • 2 tbsp. Soy Sauce
  • 1 1/4 lb. Salmon, skinned and cut into filets
  • 1 tbsp. Olive Oil
  • Salt and Pepper, to taste
Directions:
1. Heat broiler. In a small bowl, combine the brown sugar and soy sauce. Set aside.
2. Place the salmon in a casserole dish or on a rimmed baking sheet. Drizzle with olive oil and season both sides with salt and pepper. I always ask someone at the grocery store to remove the skin for me before I buy the fish saving us time when we go to put this meal together.
3. Broil the salmon until it is opaque throughout, about 8-10 minutes. Pull it out of the oven and brush the soy sauce glaze over the top of the salmon. Put it back in the oven and broil it for 2-3 more minutes, or until completely cooked through. Enjoy!


And that's it! Seriously, so easy and flavorful! We usually eat ours with broiled asparagus or broccoli and a side of rice!


One more day until the weekend!


Wednesday, January 22, 2014

101 in 1001: #25 1 of 5 (Wow...That's a lot of Numbers!)

Happy Snow Day New England!

Right before I left work yesterday afternoon, the snow began to fall and didn't stop until around 9:00 this morning. I believe we got a total of 16 inches of snow, but I can't confirm because, with the wind chill, it's -9 degrees outside. WAY too cold for this southern girl!

While the snow was falling last night, I decided to knock something off my 101 in 1001 list and try a hearty new recipe in our cast-iron skillet! I mean, when it looks like this outside, who wouldn't want some good old-fashioned comfort food?!?


Let me tell you, this recipe turned out AMAZING and will definitely be entering into our regular recipe rotation- plus it was super easy to make and only dirties up ONE pot!!

Without further ado, I present to you my take on Skillet Lasagna!


Ingredients: 


  • Olive Oil 
  • 1 lb. Ground Italian Sausage (I bought the hot variety instead of sweet) 
  • 1 (28 oz) can Diced Tomatoes 
  • 1 (8 oz) can Tomato Sauce 
  • 1/2 Onion, chopped 
  • 1 tsp. Minced Garlic 
  • 1 1/2 cup Chicken Broth 
  • 1 pkg. Four Cheese Ravioli (I bought frozen because it was cheaper)
  • 2 cups Mozzarella Cheese 
  • 1/2 cup Parmesan Cheese, plus more for topping 
  • Parsley, to taste 
Directions: 

In the cast-iron skillet, Coat the bottom with Olive Oil. Add in garlic and onions, and saute over medium heat for about 5 minutes or until onions become soft. 

Add ground sausage to the pot and cook all the way through. Once sausage is browned, mix in diced tomatoes, tomato sauce, chicken broth, and ravioli. 


Bring the mixture to a boil and then reduce heat to medium and let simmer until ravioli is tender and the sauce has reduced and thickened, about 15-20 minutes. 

Remove the skillet from heat and stir in cheeses. Serve hot. 


I served our meal with roasted asparagus and garlic bread- SO good! 


Enjoy! 


Monday, January 13, 2014

Holdiay Recipes: Mom's Pineappe Casserole

Happy Monday! Ryan and I have been home and back in our normal routine for a few weeks now, which means I'm starting to miss Georgia and family again. To ease my homesickness (if that's wasn't a word before- it is now!), I've decided to FINALLY post one of my families favorite side dish recipes, Hot Pineapple Casserole! This recipe literally takes 5 minutes or less to prepare and always turns out so great, especially paired with a Honeybaked Ham. We usually eat this as part of our Christmas dinner, but it's great for any meal of special occasion. In fact, I think this might be on our Valentine's day menu next month! 

Ingredients: 

  • 2 large cans Chunked Pineapple, drained 
  • 1 cup Sugar
  • 5 tbsp Flour 
  • 1 1/2 cup Ritz Crackers, crushed 
  • 1 stick Butter, melted 
  • 1 1/2 cups Cheddar Cheese 
Directions: 

Place the drained pineapple into a buttered casserole dish. Combine sugar and flour and pour over the pineapple. 


Sprinkle cheddar cheese and ritz crackers over the top of the casserole. Pour the melted butter over everything and bake for 30-35 minutes or until cheese is melted and bubbly. Serve hot. 


Monday, January 6, 2014

Holiday Recipes: Aunt Lorie's Hanky Panks

Now that we're into January, our lives are beginning to return to normal again. While we had an amazing time driving up and down the east coast and spending time with friends and family over the holidays, I'm looking forward to getting back to our regular schedule! I don't begin my second semester until the end of January though, so I plan to spend this in-between time after work FINALLY catching up on the many MANY recipes I wanted to get up here. While all of the recipes I plan to post are delicious and some of my favorites, this first recipe will always hold a special place in my heart. This Hanky Panks recipe comes from the kitchen of my Aunt Lorie and always makes me think of some amazing memories with the Schoeff family in Lawrenceburg!

Ingredients:
  • 1 lb. Ground Beef
  • 1 lb. Ground Sausage
  • 1 pkg. Velveeta Cheese
  • Red Pepper Flakes, to taste (I tend to use a lot because I like the kick)
  • Salt and Pepper, to taste
  • 1-2 packages of either (or both) Party Rye Bread or Pumpernickel Bread

Directions:

In a pan, brown both the meats. While the meat is browning, cube the Velveeta cheese. Add the cheese and spices and mix until everything is melted/well blended.


Line a baking sheet with tin foil and lay the small slices of bread out. Scoop a spoonful onto each bread and place the whole pan in the freezer. Once the mixture is frozen, transfer the Hanky Panks to a gallon-size Ziploc bag and keep in the freezer until ready to heat and serve.


To heat up:
Preheat oven to 350 degrees.

Spread Hanky Panks out on a baking sheet and bake for 15-20 minutes or until heated through and bread is a bit crispy. Enjoy!


These are easy to make and will definitely be a party pleaser (at least they are for my family!)

Stay tuned for more recipes!


Monday, December 2, 2013

TWO Freezer Meals. 5 Minutes

These are too good and too easy not to share with EVERYONE! Today, after work, I headed to the grocery store to pick up a couple groceries. While I was there, I was thinking about how little I wanted to cook dinner every night when it gets dark at 4pm. I decided to grab what I needed to make a couple more freezer meals and keep from cooking a few extra nights this month! From start to finish, these meals took 5, I repeat, FIVE minutes to put together and get in the freezer! 

1. Chicken Tortilla Soup: 

Ingredients: 


  • 2 Chicken Breasts 
  • 1/4 cup Diced Onion 
  • 1 tsp. Minced Garlic 
  • 1 (4 oz.) can Chopped Green Chiles 
  • 1 (10 oz) can Enchilada Sauce 
  • 1 can Rotel 
  • 1 can Corn, drained 
  • 1 tsp. Ground Cumin
  • 1 tsp. Chili Powder 
  • Salt/Pepper, to taste 
Directions: 

Place all ingredients in a gallon-size Ziploc bag. Seal and lay flat in freezer. *I have found that freezer meals take up less space in the freezer when you lay them flat until frozen. Then you can stand them upright and stuff them in like folders!* 

When ready to cook, take out and defrost overnight in fridge. Transfer contents of bag into a crock-pot and cook on low for 7-8 hours. This is great on it's own as a soup or over rice, which is the way I prefer it! 


2. Cream Cheese Chicken Chili:

Ingredients: 

  • 2 Chicken Breasts 
  • 1 can Black Beans, drained and rinsed 
  • 1 can Corn, undrained
  • 1 can Rotel 
  • 1 package Ranch mix 
  • 1 tsp. Cumin 
  • 1 tbsp. Chili Powder 
  • 1 tsp. Onion Powder 
  • 1 pkg. Cream Cheese 


Directions: 

Add all ingredients into a gallon size Ziploc bag except for the cream cheese. Freeze flat.  

When ready to cook, defrost in the freezer overnight. Place the contents of the bag into a crock-pot. Place the cream cheese on top and cook on low for 6-8 hours. Stir cream cheese into mixture when done cooking and shred chicken. Again, Ryan and I like this chili served over white rice. 


That's it. SO easy and it'll save you time in the kitchen in the long run. Enjoy!