Showing posts with label pinterest. Show all posts

Monday, December 8, 2014

My Favorite Things To Do With Burlap (Right Now)

Hello and happy Monday! This weekend went by like a blur and was filled with mall shopping, whiskey tasting, football watching, and errand running. While everything was great, the football game could have gone a little better (darn you, FSU!) 

So...if you've read any of my recent blogs...you already know what my first Christmas craft of the season was. Without being redundant, I just wanted to share a few quick tips on how this little burlap wreath was created. 

After scouring Pinterest for craft ideas in November, I quickly decided a festive burlap wreath for the front door would be perfect! There were so many tutorials on Pinterest that I thought for sure it would be a breeze. Wrong! 
Luckily, I first tackled this craft at my friend Rachel's house. I say luckily because we all know two heads are better than one! On top of that, Rachel is a master crafter, so we figured it out pretty quickly together! We found that the best way to figure out how to put together a burlap wreath is to use a combination of directions from various websites. There are 2089357483942 different blog posts that can be found via Pinterest already, so I really don't see the need for me to spell it out one more time. 

Basically, all you need is a wire wreath, burlap ribbon (about 60 ft.), some accent ribbon, and either floral wire or pipe cleaners. I got all of my supplies at A.C. Moore for $8! These wreaths sell for $45+ on etsy! 


Just some extra tips: 
  • Start your burlap weaving on the outermost wire ring and weave over, under, over, under toward the inside of the ring. 
  • Weave the burlap through four times in each section so that the wreath is fuller. 
  • I really wanted to add an accent ribbon in to bring a pop of color to the neutral burlap. I found it best that the accent ribbon be wired. I weaved the accent ribbon through each section two times, trying my best to space them out evenly. 
That's it! I enjoyed this craft (and the end result) so much, that I made another one for my mom in Virginia! 

Another way I'm loving burlap this holiday season is as a Christmas card holder! I had some extra burlap ribbon from the wreath craft that I wasn't sure what to do with. Then one day while I was perusing the isles at Marshalls, I came across a couple packs of festive mini clothespins and immediately knew what to do! 

I didn't end up using the washi tape back there for this craft...but you will be seeing that again in a few days! 

Off of our makeshift pantry in the kitchen, I rolled down the burlap ribbon. I am currently using the clothespins to hold all of our beautiful Christmas cards we've already received (Seriously people... some of ya'll are on TOP of your game this year!). I LOVE the way it turned out and that I get to admire everyone's cards every time I walk into the kitchen! 


Alright, I am off to a Christmas cookie swap! The Christmas festivities have officially begun for this little Smith family! Have a great night, everyone! 


Friday, November 28, 2014

Juicy Crock-Pot Turkey Breast


Hello and Happy Black Friday!!
 
I hope everyone had a wonderful Thanksgiving day with their friends and/or family! The Schoeff/Smith clan had a great day in Virginia and an awesome dinner at the Mimslyn Inn in Luray!
 
I'm sure ya'll are all turkeyed out by now, but I never got a chance to post this recipe before the big holiday! Who says turkey is only for Thanksgiving, though?!? As I mentioned in this post, I had my first go at cooking a turkey breast last weekend when we had our friends, Eliot and Lauren, over for a little Friendsgiving dinner. I was pretty nervous since I had never attempted to cook a turkey breast before and know how dry they can get. Also, cooking a turkey breast in the crock-pot was a pretty new idea to me. But I gave it a go anyways. I'm glad I did because the result was an easily prepared and juicy turkey! This will definitely be made again for a nice Sunday dinner and used in sandwiches throughout the week! A much better option to salt-loaded lunch meat!
 
Ingredients:
 
  • 6-7 lb. Turkey Breast (bone-in)
  • 1 cup Orange Juice
  • 1 can Cranberry Sauce (I used jellied, but you could use whole if you prefer- jellied made an easier gravy since I didn't have to break down the cranberries.)
  • 1 package Onion Soup Mix
Directions:
Take the turkey breast out of the packaging and make sure the cavity is cleared out. Place the bird in the crock-pot.
In a mixing bowl, combine orange juice, cranberry sauce, and onion soup mix. Pour over top of the turkey.
 
 
Cook on low for 8-9 hours or until the meatiest part of the bird reaches 175 degrees.
 
Remove turkey from crock-pot. You have two options here. You can either place the bird on a baking sheet and broil for 5 or so minutes to crisp up the skin or just let it rest for 5 minutes before carving.
 
 
Carve it up and serve!! Enjoy- I know we did!


Tuesday, November 18, 2014

Taco Crescent Ring


For Life Group last Thursday, the food theme was brought to you by "the letter R!" Racking my brain for recipes that began with the letter "R" for a couple days, I remembered one of my favorite party dishes...the crescent ring. Janelle and I made a buffalo chicken crescent ring together a couple months ago for a get together. While we were assembling the ring, we came up with tons of different other fillings that would work great inside the crescent ring. Last Thursday, I finally decided to try a different filling, and it turned out awesome! Plus it was super easy and came together in thirty minutes, baked and ready to eat! 


Ingredients: 

  • 1 1/2 lbs. Ground Beef 
  • 2 cans Crescent Rings 
  • 2 pkgs. Taco Seasoning
  • 1/2 cup Water 
  • 2 cups Mexican Cheese, shredded
  • Taco Sauce and Sour Cream, optional

Directions: 
In a skillet, brown the ground beef. Once browned, add in taco seasoning and water. Bring to a boil and then simmer on low for 5 minutes.

While the meat is simmering, lay out parchment paper on a baking sheet. Spread out each crescent triangle, leaving a circle in the middle. I started with four triangles, forming the points on a compass with points facing out. I filled in the gaps from there with the remaining triangles.

Spoon the meat in a ring around the dough about an inch from the center edge. Sprinkle a cup of cheddar cheese over top of the meat.

Wrap the triangles over the filling, pressing the small edge into the center ring to seal shut.

Bake for 15 minutes at 425 degrees. Let cool for five minutes. At this point, you can transfer to a serving platter and fill the center ring with lettuce, grape tomatoes, sour cream, cheese, taco sauce... you name it! I served mine with sour cream and taco sauce, mainly because I did my grocery shopping at Target this week and they didn't have much fresh produce. Lazy me.

 Enjoy!

Monday, November 3, 2014

November Goals

Holy Cow. I cannot believe that it's November already. It's blowing my mind how quickly this fall is going and how close the holidays are getting. I'm feeling my work load at school lighten, which has motivated me to take on some new challenges this month. I really enjoyed setting goals for myself this past June, and blogging about them seemed to help hold me accountable throughout the month. On Saturday morning, I wrote down four goals I hope to accomplish by the end of the month that I would like to share with ya'll now!

1. Take 3 fitness classes every week.
Right after we got back from our trip to Ireland, I joined a gym with my friends Heidi and Janelle. I have been going fairly consistently since then and have noticed a huge difference in my energy and stress levels. However, now that it's getting dark earlier (like 4:30 early WAH!) I just know I am going to need more motivation to get my butt to the gym on a regular basis. I am hoping that by setting this goal AND blogging about it, I will feel more accountability to maintain this goal for the entire month.

2. Read a new book not related to Grad School.
I've been doing a LOT of reading these last few months, but it has all revolved around teaching children to read. While this is a topic I am interested in, I have put aside my long list of free readings books from this summer for far too long. This month, my goal is to finally tackle that list, reading at least one book.

3. Finish my Christmas shopping.
This is probably going to be the biggest challenge of the month. I am going to have a lot going on in December and I would feel much better about that knowing I don't have to fight mass crowds to get my Christmas gifts for family and friends. Plus, wrapping every gift takes me about a month anyways so I might as well get shopping out of the way early!

4. Complete a Christmas DIY.
My craft Pinterest board has been overflowing lately with fun DIY's that would spice up our Christmas decorations this year. Plus, I picked up a couple rolls of burlap ribbon from a random bin at the Dollar Store last week and I've been dying to use it. So a Christmas DIY is a must this month!

Well, we'll see how this shakes out, right?!

Happy November everyone!


Wednesday, October 22, 2014

Fall Chili Recipes, Ya'll

With the weather being cool and rainy lately (especially rainy at this particular moment), I've really been craving warm and hearty crock-pot meals for dinner. In the last few weeks, I've pulled my crock-pot out more times than I haven't. I've always been a huge fan of soups this time of year, but Ryan is convinced that soup does not constitute a "meal." Since he was never really on board, I rarely ever make any sort of soup, including stews, chili, and chowders. HOWEVER, we had friends over a couple of weeks ago to watch the Pats game and I made a big batch of chili to share. Surprisingly, Ryan actually enjoyed it! So, clearly with this sudden change of heart I have been making as many variations of "soup" that I can get away with. Tonight, I'm sharing two of my favorite chili recipes, which happen to be polar opposites of each other. The first is a traditional chili recipe I have made time and time again, tweaked from one of my favorite Southern Living recipe books. The recipe makes a TON... I mean a ton! But it can always be cut in half OR frozen to make TWO meals!

Traditional Big Batch Chili 


Ingredients: 

  • 4 lbs. Ground Beef
  • 2 Onions, chopped
  • 1 Green Bell Pepper, chopped
  • 3 tsp. Minced Garlic
  • 3 (14.5 oz) cans Diced Tomatoes, undrained
  • 4 (8 oz) cans Tomato Sauce 
  • 1 (6 oz) can Tomato Paste
  • 1/4 cup Chili Powder
  • 1 tbsp. Sugar
  • 1 tsp. Salt
  • 1 tsp. Pepper
  • 1/2 tsp. Paprika
  • 1/2 tsp. Crushed Red Pepper
  • 2 (16 oz) cans Kidney Beans, rinsed and drained
  • Toppings: Sour Cream, Cheddar Cheese, Green Onions 
Directions: 
1. Cook ground beef until no longer pink; drain. 
2. Place meat in slow cooker; stir in the rest of the ingredients. 
3. Cover and cook on low 7-8 hours or high 5-6 hours. Serve with desired toppings

Simple and Traditional! 


The next chili recipe is a little more unique. I had a couple of sweet potatoes in the house that I wanted to cook up and I thought they would be a great addition to a turkey chili, but I COULD NOT find a recipe online that I liked...so, I made one up! I was a little nervous about how this would turn out, but it was delicious! Next time, I will probably add more beans. (I didn't add as many this time because my friend Heidi doesn't like them and she was coming over for dinner.) 

Turkey & Sweet Potato Chili 

Ingredients:
  • 1 lb. Ground Turkey
  • 1 Onion, chopped
  • 1 Red Bell Pepper, chopped
  • 2 Sweet Potatoes, diced
  • 30 oz. Tomato Sauce
  • 30 oz. Diced Tomatoes 
  • 1 can Black Beans, drained and rinsed 
  • 2 tbsp. Chili Powder
  • 1 tbsp. Cumin
  • Salt/Pepper, to taste 
Directions: 

1. Brown ground turkey and onion; transfer to crock-pot.
2. Combine remaining ingredients and cook on low for 7-8 hours or high for 5-6 hours.


There you have it! Two very different, very tasty chili recipes to try out during this wonderful time of year!

Happy Hump Day, ya'll!

Thursday, October 31, 2013

From Bouquet to Ornament: An After-Wedding Craft

Happy Halloween blog readers!! I hope everyone enjoyed their fair share of Halloween candy! Ryan and I actually got 7 trick-or-treaters in this apartment complex of us- so there was plenty of candy left over for us!
 
 
Anyways... in an effort to clean out some of the stuff that has accumulated over the past 8 months in our limited closet space, I finally got around to a wedding craft that has been waiting for me since we got back from our honeymoon back in December.
 
 
My wedding bouquet was one of my most favorite details from our big day. For 3 months, my mom hung the beautiful flowers upside down in my parents windowsill, letting the flowers dry out. Once they were sufficiently dried out, she carefully wrapped up the bouquet and mailed it up to Boston, along with a pack of clear glass ornaments. (Thanks for doing all that, mom!)


Last weekend, I finally unwrapped that sucker, and sadly tore it to shreds in the hopes that the final result would be worth the destruction!


Ryan's Boutonniere 10 months later!
 Each ornament received at least one ivory rose, a big pinecone, some baby pinecones, silver brunia, and some dusty miller. For one of the ornaments, I cut a square of the lace and burlap off from the bouquet handle and placed it inside. I finished them off with a strip of the crochet lace and burlap ribbon that was tied to the flower bunches that decorated the tables at our reception.


There are some many special touches in these ornaments from that day and I really think they turned out awesome! Ryan and I can't wait to hang them on our first Christmas tree together and further reminisce about the magic of December 15, 2012!!


Wednesday, October 30, 2013

Tailgate Meatballs

Happy Halloween Eve, ya'll! We have some fun things planned for this holiday.. hopefully starting off with a World Series win from the Red Sox!!
 
 
Last Sunday, Ryan and I spent some time with our friends Jenna, Trevor, and Caitlin watching the Patriots game. (Don't worry- I'm still a diehard Falcons fan... despite the season we're having!) Knowing that we were going to be watching the game together, I decided to try out a new recipe to bring over which turned out awesome! And it comes together super easy! It's really a win-win!
 
Here's what you'll need:
 
  • 1 lb. Sausage (without the casing)
  • 1 pkg. Cream Cheese
  • 1 cup Cheddar Cheese
  • 1 1/3 cups Bisquick mix
Directions:
 
Preheat oven to 400 degrees.
 
 
In a large mixing bowl, combine all ingredients until well incorporated. Roll mixture into 1-inch balls and place on a foil-lined baking sheet.
 
 
Bake 20-25 minutes or until browned.


I told you they were easy!! Enjoy!

Oh, and GO SOX!!

Monday, September 30, 2013

What's Fall Without Some Good 'Ole Apple Recipes?!

Since Ryan and I picked a peck of apples in Vermont last weekend, we have been trying feverishly to incorporate them into some recipes- which really isn't that hard since I love cooking with apples anyways! This weekend alone we made cinnamon applesauce, apple pancakes, and my favorite, a homemade apple cake!


 Now, let me just talk about this apple cake for a minute. This recipe was handed down to me by my mother-in-law, Susan. I've made it so many times and it's always a crowd-pleaser. Plus, it's pretty easy to make! The only downside is that it takes almost an hour and a half to bake, so you have to sit around and smell the deliciousness for a while before you can actually dig in!


 Ingredients: 


  • 1 1/2 cups Vegetable Oil 
  • 2 cups Sugar 
  • 3 Eggs
  • 3 cups All Purpose Flour
  • 1 cup Chopped Nuts (I use walnuts) 
  • 1 tsp. Salt 
  • 1 tsp. Baking Soda
  • 2 tsp. Vanilla extract
  • 3-4 large Apples, chopped
Directions: 

Preheat oven to 325 degrees. 

Combine oil, sugar, and eggs in a mixer and beat 3 minutes at medium speed. Add vanilla. Add flour, salt, and baking soda a little at a time and mix until well incorporated. Fold in apples and nuts. 


Pour into a lightly greased bundt pan and bake for 1 hour and 20 minutes or until fork is inserted and comes out clean.


Once the cake comes out of the oven, you can begin making the caramel-ish sauce that goes on top.

Sauce Ingredients: 

  • 1 stick Butter
  • 1/2 cup Light Brown Sugar
  • 2 tbsp. Milk
Directions: 

Combine all ingredients in a small pot and bring to a boil. Cook 5 minutes, stirring frequently. Pour over cake while it's still in the bundt pan and let cake cool completely before removing. 


Enjoy! It's seriously not fall until I've baked this cake at least once! Thanks for the recipe, Susan!!


Tuesday, September 10, 2013

Happy Fall Decorating, Ya'll!!

Fall is by far my favorite of the four seasons. When Ryan asked me what I thought about moving to Boston, the first thing I thought about was not only getting to experience all 4 seasons, but more importantly, getting to experience a New England fall. Well that time is here, and let me tell you, the weather has not been disappointing lately! Our windows are open 24/7, the new crock-pot has been getting a workout, and I'm just about ready to pull my boots out of storage! Now, I just hope this weather sticks around for a while before the frigid temps set in!!

In the spirit of this MOST wonderful season, I decided to share with ya'll some of my favorite fall decorations hanging out around our apartment!

Let's start with a DIY project I tackled last fall. I had some burlap laying around and Pinterest told me if I had the right printer I could run the fabric through and print anything I wanted on it! I decided to create what you see below. Once I figured how how to get the printer to recognize the burlap, the project took about 20 seconds! Once the design was printed, I took an orange sharpie to the pumpkin and colored it in for that extra pop!


That little beauty currently sits on this shelf:


Our side table: 
Mmm more burlap! 
TV console: 


Buffet and Hutch:

I had some extra leaves laying around so I stuffed them all into a mason jar and called it a day.


 My favorite decorating spot- the entry table we built:


 I made the wreath below for 3 dollars (minus the S). I bought a twig wreath, a leaf garland, and a fall flower garland for a dollar each from...the dollar store. When I got home, I wrapped the leaf and flower garlands around the twig wreath as many times as possible and then threw the S up in the middle and tied it all to an 11x14 whitewashed open frame! Voila!


Last fall, I also made this burlap banner. I bought a yard of burlap and a bunch of fall-themed scrapbook paper from Joann's. I cut out banner shapes from the burlap and printed block letter outlines onto the back of the scrapbook paper then cut those out as well. Finally, I glued it together and hung each banner piece up to a large piece of twine with a small clothespin. The coolest thing (to me) about this banner is that its reversible! On the other side, I created a christmas-themed banner that spells out "Peaceful". Boom!


Finally, you fall decorations can't be complete until you add some beautiful sunflowers! (Thanks again, Hubby!!)


And there you have it! A quick overview of my favorite fall decorations put out for my favorite time of the year! Happy Fall, Ya'll!! 

Friday, August 30, 2013

A Weeks Worth of Meals Chillin' In My Freezer

In 4 days, my life is going to get A LOT busier. On top of starting a new job, I will also be attending classes for my Masters... all starting next week. I think I know myself well enough to know that I'm probably not going to want to cook dinner every single night, especially when I don't get home until after 8 p.m.. I love Ryan, but we probably shouldn't eat chicken and rice three times a week. So, I set out yesterday to stock our freezer with meals that we can enjoy on those days where we're too tired to make anything else!

I've seen these recipes floating around Pinterest for a while now, so putting them on my blog is really just for my sake and the sake of anyone else who just wants a couple easy freezer dishes all in one place. Anyways, first thing yesterday morning, I headed to the grocery store to pick up everything I would need for 6 meals + all of our dinners for next week! This turned out to be a really good day to buy all of my ingredients because the Stop & Shop was having a HUGE sale on all their meat. Score!

When I got home and unpacked the groceries, I immediately threw all of the chicken in to a pot of water to poach and all of the ground beef in a pan with chopped onions to brown. That way, all of my meat was cooked and could be incorporated into whichever meal it was intended for quickly.
Mid- Madness. 
In no particular order, here are the recipes I cooked up yesterday! (Sorry the pictures are crappy. I didn't take any pictures before I put them in the freezer, so everything was already frozen when I got around to it last night. Plus the lighting in my kitchen at night isn't the best!)

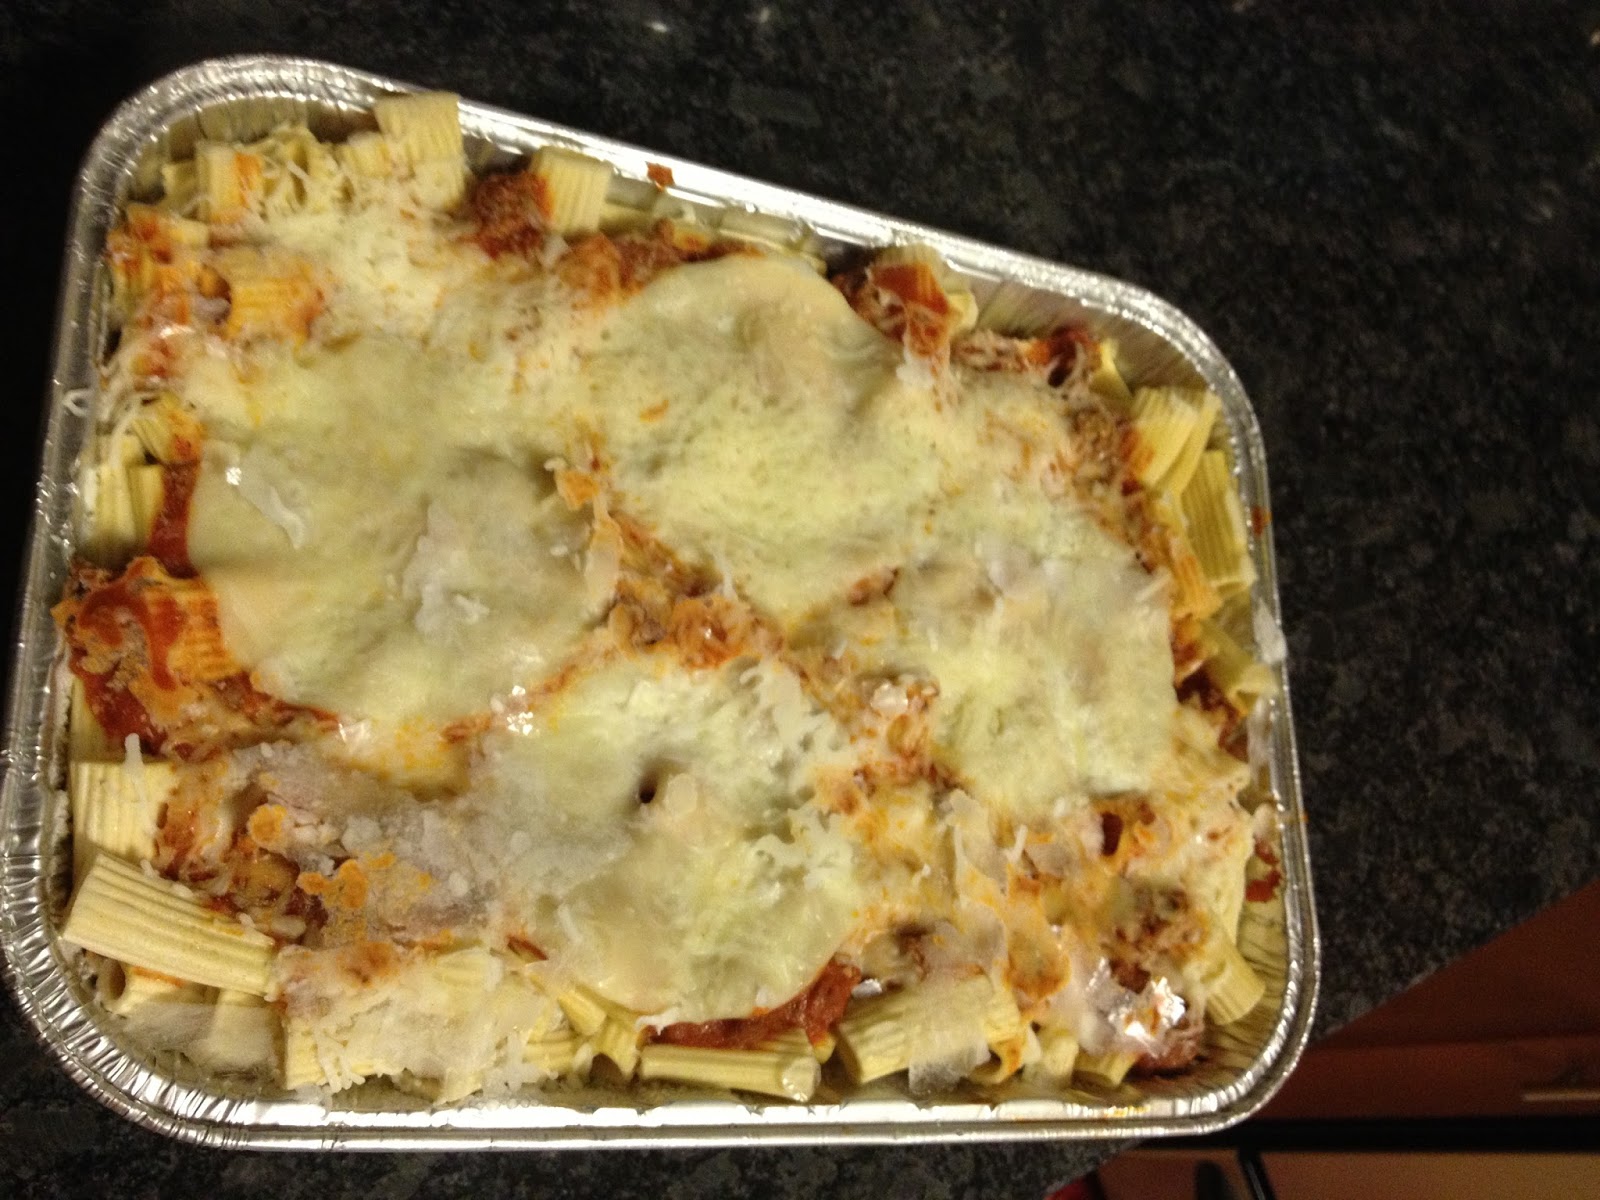
Baked Ziti: 


Ingredients: 

  • 1 lb. ziti pasta 
  • 1 onion
  • 1 lb. ground beef 
  • 1 1/2 jars spaghetti sauce 
  • 10 slices provolone cheese
  • 1 1/2 cups sour cream 
  • 6 oz. mozzarella cheese, shredded 
  • 2 tbsp. parmesan cheese 

Directions: 

1. Bring a large pot of lightly salted water to a boil. Add ziti pasta and cook according to package directions.
2. In a large skillet, brown onion and ground beef over medium heat. add spaghetti sauce and simmer 15 minutes.
3. Layer in pan: half of the ziti, half the sauce, 5 slices of provolone cheese, half the sour cream, and half the mozzarella cheese. Repeat with remaining ingredients and top with parmesan cheese. Cover tightly with tin foil and place in freezer for up to 2 months.
4. When you're ready to eat, take casserole out of the freezer and defrost in the fridge over night or for 8 hours. Bake covered for 30 minutes at 350 degrees, or until cheese is melted.

Original Recipe can be found here.

Broccoli, Chicken, and Rice Casserole


Ingredients: 
  • 2 cups cooked rice (I used white) 
  • 1 1/2 cups chicken, chopped 
  • 1 1/2 cups broccoli, chopped and steamed 
  • 1 can cream of mushroom soup
  • 1 can cream of chicken soup
  • 2 cups shredded cheddar cheese 
  • salt and pepper to taste 
Directions: 

1. Once everything is cooked and prepared, combine all ingredients in a large pot and transfer to a lightly-greased casserole dish. Sprinkle the top with cheddar cheese and seal the casserole dish with tin foil. 

2. When you're ready to eat, defrost in fridge overnight or for 8 hours. Bake at 350 degrees, uncovered, for 25-30 minutes, or until heated through and cheese is bubbly. 

Original recipe can be found here.

**The rest of these recipes came from one of my favorite cookbooks- Southern Living's Busy Mom's Weeknight Favorites. No, I am not a mom, but I can be busy and these recipes are awesome!**

Taco Casserole


Ingredients: 

  • 1 lb. ground beef
  • 1 onion
  • 1 tsp. minced garlic
  • 1/2 tsp. pepper
  • 1 can kidney beans, drained 
  • 1 can cream of chicken soup 
  • 1 can cream of mushroom soup 
  • 1 (10 oz) can diced tomatoes and green chiles, undrained
  • 8 (6-inch) corn tortillas, cut into quarters 
  • 16 oz. cheddar cheese, shredded (Original recipe calls for Velveeta cheese crumbles- but I couldn't find them.) 
Directions: 
  1. Cook first four ingredients in a large skillet, until beef is no longer pink. Drain and return to skillet. Stir in beans, cream of chicken soup, cream of mushroom soup, and diced tomatoes. 
  2. Layer half of tortillas in the bottom of your casserole dish. Top with half of the meat mixture and half of the cheese. Repeat layers with the remainder of the ingredients. Cover tightly with aluminum foil and freeze for up to two months. 
  3. When you're ready to eat, defrost in fridge overnight or for 8 hours. Bake, uncovered, for 45-55 minutes, or until thoroughly heated. 


Beef Lombardi


Ingredients: 

  • 1 lb. ground beef
  • 1 (14.5 oz) can diced tomatoes, undrained
  • 2 tsp. sugar 
  • 1 1/2 tsp. salt 
  • 1/4 tsp. pepper
  • 1 (6 oz) can tomato paste
  • 1 bay leaf 
  • 1 package egg noodles
  • 1 (8 oz) container sour cream
  • 1 cup sharp cheddar cheese, shredded 
  • 1 cup grated parmesan cheese 
  • 1 cup mozzarella cheese 
Directions: 
  1. Cook beef in a large skillet over medium heat until browned. Drain and return to pan. Stir in diced tomatoes, sugar, salt, and pepper and cook for 5 minutes. Add tomato paste and bay leaf, and simmer 30 minutes, stirring occasionally. 
  2. Meanwhile, cook egg noodles according to package directions; drain and return to pan. Stir in sour cream. Spoon noodle mixture into casserole dish. Top with meat mixture and sprinkle with cheeses. 
  3. Cover tightly and freeze for up to two months. 
  4. When you're ready to enjoy: Remove from freezer and defrost in fridge overnight or for 8 hours. Bake, covered, at 350 degrees for 35 minutes. Uncover and bake 5 more minutes.

Chicken & Stuffing


Ingredients: 
  • 1/4 cup butter 
  • 2 celery ribs, chopped 
  • 10 cornbread muffins, crumbled (my grocery store always has fresh cornbread for sale in the bakery, so I just bought a pan of that.) 
  • 1/2 (16 oz.) package herb-seasoned stuffing mix
  • 5 cups chicken broth
  • 1 1/2 cups cooked chicken, chopped 
  • 2 large eggs 
  • 1/2 tsp. poultry seasoning
Directions: 
  1. Melt butter in a large skillet over medium heat; add celery and saute 5 minutes or until tender. 
  2. Combine cornbread and remaining ingredients in a large bowl; add sauteed mixture, stirring well. Spoon mixtures into a casserole dish; cover tightly with aluminum foil and freeze for up to two months. 
  3. When you're ready to eat, defrost in fridge overnight or for 8 hours. Uncover casserole and bake at 350 degrees for 55 minutes or until lightly browned. 


And there you have it! 5 good-looking recipes waiting to be defrosted and consumed on a night off from the kitchen!

Now, the 6 recipe was originally intended to be a freezer meal, but I needed something to bring with me to life group last night, so I cooked up double of this one and put the other half in the fridge to eat for dinner tonight. (I just cooked for 5 hours... I'm taking a day off!)

Ham Tetrazzini 


Original recipe calls for Turkey instead of ham- but Ryan and I always preferred ham in this one!
Ingredients: 
  • 12 oz. vermicelli, broken in half 
  • 1 tbsp. butter 
  • 1 medium onion, chopped
  • 1 package mushrooms
  • 1 tsp. minced garlic
  • 4 cups cubed ham steak
  • 1 1/2 cups cheddar cheese, shredded
  • 1/4 cup parmesan cheese
  • 1 can cream of mushroom soup
  • 1 can cream of celery soup
  • 1 (8 oz) container sour cream
  • 1/2 cup chicken broth
  • salt and pepper, to taste
Directions: 
  1. Cook vermicelli according to package directions. Meanwhile, melt butter in a large pot over medium-high heat; add onion, mushrooms, and garlic; saute 5 minutes or until tender. 
  2. Stir in ham, 3/4 cup cheddar cheese, and remaining 7 ingredients. Drain vermicelli, and add to ham mixture; stir well. 
  3. Spoon mixture into casserole dish and sprinkle with remaining cheese. Cover tightly with aluminum foil and freeze for up to two months. *I skipped this step since we're eating it tonight!*
  4. When you're ready to eat, defrost in fridge overnight or for 8 hours. Bake at 350 degrees, covered, for 1 hour. Uncover and bake 15 more minutes or until thoroughly heated and cheese is bubbly. 

Phew, that was A LOT of cooking! If this turns out to be as good of a thing as I think it will be, I will be doing something like this once a month! Stay tuned! 


Wednesday, August 28, 2013

DIY Necklace Holder

I'm sick of studying. Just in time for my Master's classes to begin. (1 week- AH!) I'm taking my final MTEL (General Curriculum + Math) this afternoon and praying to GOD I pass so I can put these tests behind me!

I honestly believe I have studied as much as I can to prepare myself, so before I go sit in front of the computer for 255 minutes, I'm plopping down in front of my computer to tell ya'll about a recent project Ryan and I tackled last week!

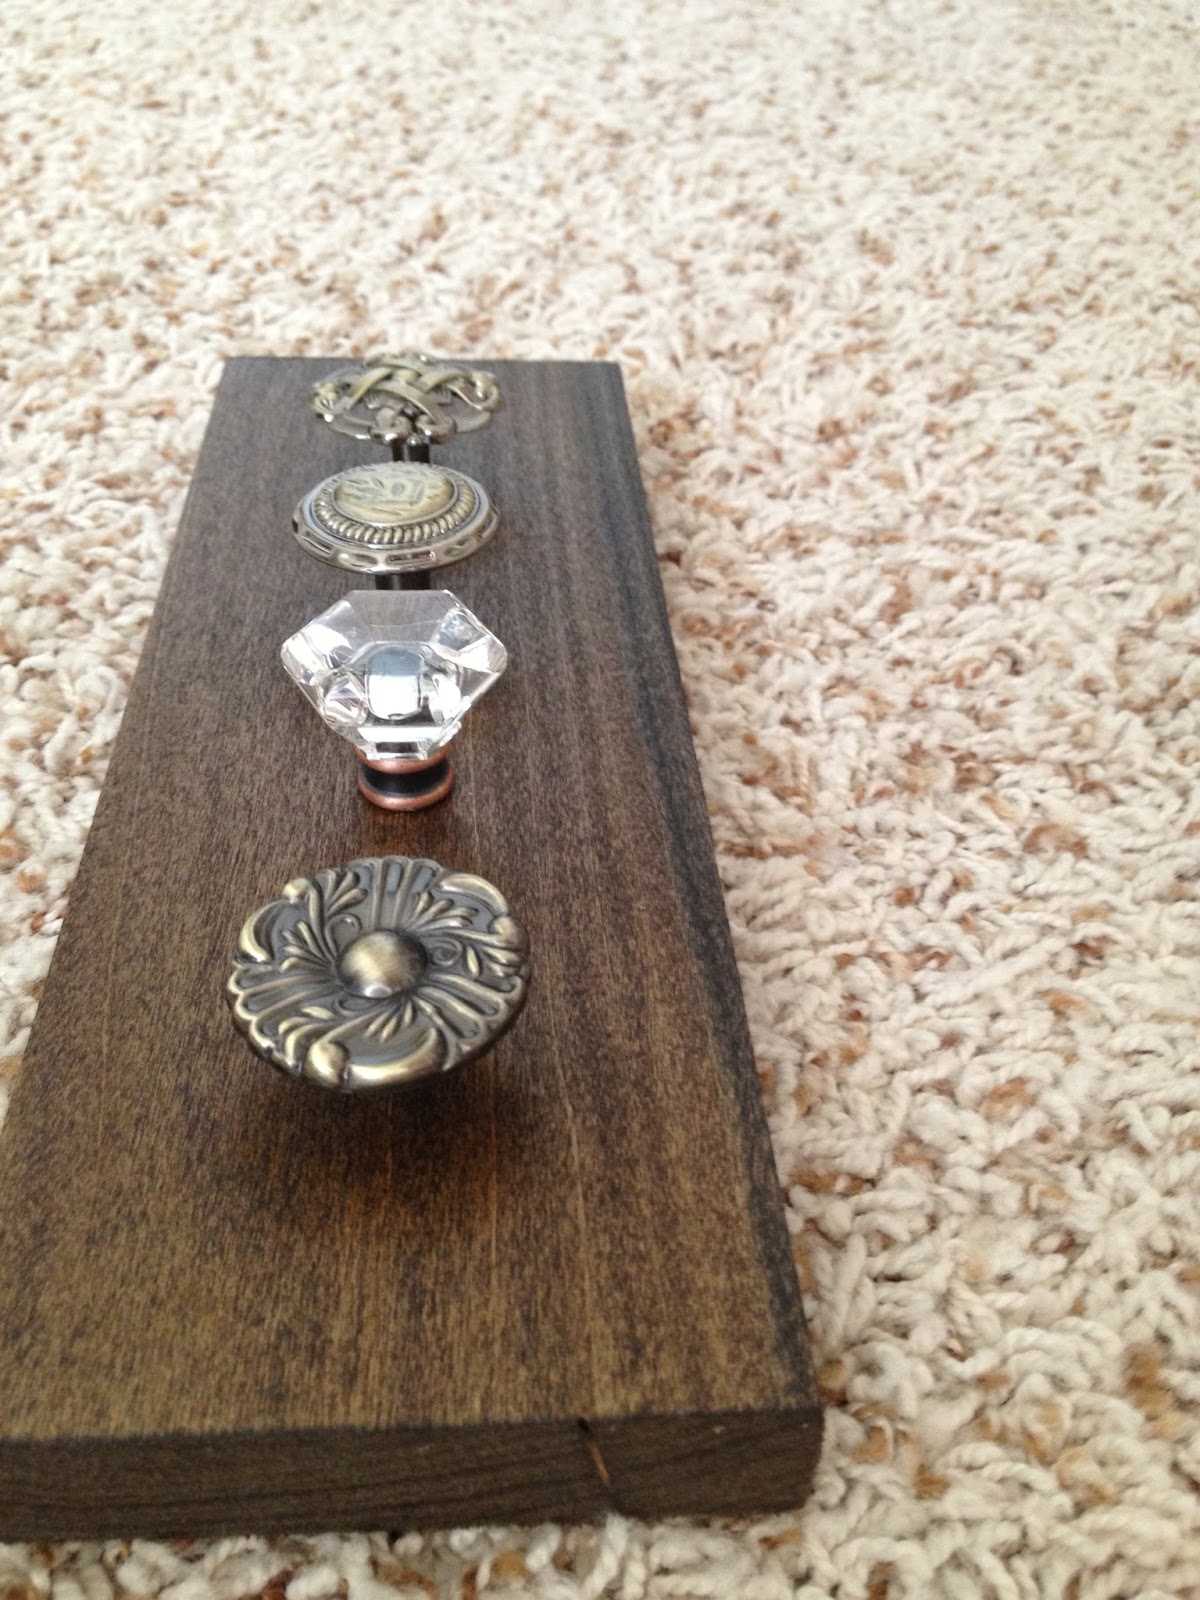
Since I began substitute teaching last year, my jewelry wardrobe as continued to grow- since everyone knows a cute necklace can make an outfit, right?! Anyways, I had all these necklaces laying around and nowhere to really store any of them. So, of course, I took to Pinterest to find a solution! I stumbled upon an Etsy sight that sold Jewelry organizers and thought, "I could totally make that myself!" So, I did!


Here's what you need:
  • 1 piece of wood (I went to Home Depot and had them cut a piece of wood to 1x4x10 for $1.50!)
  • 1 can of Wood Stain + a rag you don't mind throwing away after
  • 4 drawer pulls/knobs
Directions:

Like I said before, Home Depot will cut the wood you chose to your desired length. The wall I wanted to hang this on is pretty small, so I wanted it to be just less than a foot long, therefore the man cut the 1x4 wood plank to 10 inches long. Once I grabbed that, I headed over to a different section and picked out 4 knobs I wanted to screw onto the board and a stain color. Once you have all of your supplies, the rest is easy!


First, stain your wood board. I used Minwax Dark Walnut and brushed on two coats with an old rag.


Once that dried (about 2 hours), my big, strong husband screwed in four drawer knobs. Next, we took a frame hanger and screwed that in to the top middle so that we could hang it!


Finally, we hung up the piece! Now my necklaces are displayed beautifully and won't turn into a tangled mess on top of our dresser!! Plus, the whole project cost about $10 and only took a couple hours (including drying time)! I call that a successful DIY!


Alright ya'll, I'm off to ACE this test! Wish me luck!